Chapter 1
Gain Staging for Vocals: Why Your Home Vocal Sounds Amateur
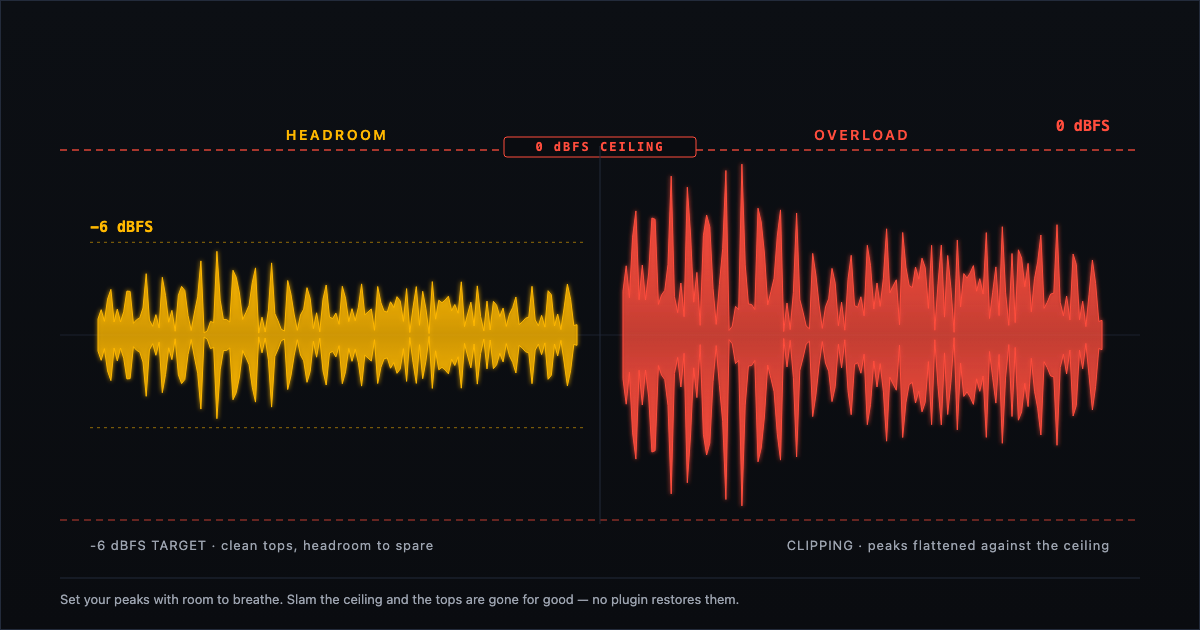
What Is Gain Staging?
Gain staging is the level your voice is recorded at — and the discipline of choosing that level on purpose, before you sing. Every digital file has a ceiling: 0 dBFS (decibels relative to full scale — the level scale digital files use, where 0 is the most the file can hold). Sound that reaches the ceiling does not get louder. The tops of the wave get flattened off. That is clipping. What was cut off is gone, and no amount of mixing brings it back. Gain staging is keeping your loudest moment comfortably below that ceiling while your quiet moments stay high enough that the full character of your voice makes it into the file. The standard in this manual, in one line: peaks around -6 to -10 dBFS, no clipping, steady levels phrase to phrase. Those are the three things this chapter covers, and they are facts the Certifier reads from your file.
Why Vocal Gain Staging Matters
Self-recording has moved from a bonus to something contractors screen for — including singers with long credits. A working professional who cannot cut a clean file from their own room is quietly losing remote work, and often does not know it.
The gap between your take and a professional take is rarely the microphone. A good microphone faithfully captures whatever happens in the room, at whatever level you give it. Record too quiet, and turning the voice up later is the least of an engineer's worries. The real loss is character: a voice captured too low comes back thin and lifeless, with not much to work with creatively. The flavor, the intensity, the emotional content, the nuance in the frequencies — those live in the file only if they were captured at the right level. There are things you cannot create later if they were not captured. Record too hot, and you get digital distortion that mixing only brings out more. A professional take sounds clean partly because there was never a problem to fix: the voice was captured at a controlled level, with room left for the mix to work, in a room that complements the performance instead of taking away from it. Level is a decision you make before the take. It is the first craft of the recording, and the first fact measured on your file.
3 Common Gain Staging Failures
1. Clipping
Clipping happens when a peak reaches 0 dBFS. The tops of the wave get cut off for good — and an engineer will tell you the cut-off wave is the least of the worries. The first real problem is playback: a clipped file with no limiter on the output can blow out a speaker. This has happened on real broadcasts — one clipped recording, no limiter, and a laptop speaker was gone. The second problem is the sound itself. Digital distortion is unpleasant and abrasive, and it cannot be removed. Mixing and mastering do not hide it; they bring it out more, and the processing that should finish the performance ends up destroying it. That is why clipped files get rejected, not repaired.
One honest nuance: digital clipping is not the devil. Used on purpose, it can be the right creative call — a Nirvana tribute with an edgy, distorted character may work exactly because of it. A Broadway recording with distortion all over it is unusable. Intent is the difference between craft and waste, and an accidental clip on a session vocal is waste. The Certifier measures clipping from the file itself, and a single clipped peak is a finding — a fact, not an opinion.
2. Recording Too Quiet
This is the more common failure, and the quieter one. Raising the level later is the easy part — any fader can do that. What is actually lost is the character of the voice. A performance whose loudest part sits down around -40 dBFS or lower comes back thin and lifeless: the flavor, the intensity, the emotional content, the nuance in the frequencies that a mix engineer shapes with equalization — those are captured at the right level or not at all. And everything else in the recording rises along with the voice — the room, the hum, the fan behind you. You can make the file louder. You cannot make it fuller, and you cannot make the room quieter after the fact.
3. Inconsistent Phrase Levels
One phrase lands at -8 dBFS; the next, ten seconds later, lands at -20. The listener hears the volume moving. A producer can ride the level across a performance, but even a good fix leaves traces — a jump here, a dip there. And in a comp, where the best phrases are gathered from many takes, level jumps between takes show up directly in the result. Consistent levels are something a listener feels before they can name it.
The Standard Numbers: Headroom, Peaks, and Noise Floor
The numbers in this standard are published, not guessed.
- The ceiling is 0 dBFS. The registry's published method assumes ordinary session gain staging — peaks around -6 to -10 dBFS. Most tracking guides in circulation cite -12 to -6 dBFS. The two agree on the substance: leave headroom, and never touch the ceiling.
- The Certifier measures true peak — the highest point of the wave, including the moments between the samples a meter can see. A file can read -1 dB on a meter and still carry a true peak at the ceiling.
- The noise floor — the level of your room when you are not singing — is where most home recordings fail. The industry had no published standard for sung vocals; every number in circulation was borrowed from audiobook delivery. The closest one, ACX's -60 dB RMS, is an audiobook spec measured on a few seconds of hand-picked silence. The registry measured real distributions of vocal files and published a standard, with the evidence, at the noise floor standard. The four bands, in the order a room usually falls through:
| Band | Range (dBFS) |
|---|---|
| Studio silent | below -70 |
| Inaudible floor | -70 to -58 |
| Library quiet | -48 to -58 |
| Audible noise | above -48 (the floor is audible beside the voice) |
The -58 boundary is the youngest of the three and is under active calibration against delivered, client-approved session files.
- A note on room tone, because "quiet" can be misread. A recording space is not supposed to be a dead vacuum. Some rooms have musical room tone — the iconic recordings of the 50s, 60s, and 70s carry room tone that complements the music, and legendary rooms like Ocean Way and EastWest are booked for their character. The real question is not whether the room makes any sound at all; it is whether the room complements the performance or takes away from it. The answer depends on the work: film voice-over wants a near-vacuum dead room, while other work may want natural room character. The bands above measure the floor — hum, fans, air conditioning, the sounds that are never musical. Those are what fail a file.
- One fact surprises people: the room, not the microphone, is the binding constraint. A good studio microphone's own noise is 10 dB-A or less. Even a quiet recording room contributes considerably more than that.
- Printed compression — compression baked into the file rather than left live — raises the measured floor by 5–6 dB, dB-for-dB. A clean room with printed compression reads 5–6 dB worse than it is. The standard accounts for this, which is why the registry distinguishes the file floor from the room floor.
- The loudness trap: -14 LUFS (a unit for overall loudness) is the target streaming services use to normalize playback. It is a delivery number, not a tracking number. A vocal delivered at that number reads to a producer as amateur delivery.
What Passing Sounds Like
Passing: at the volume you would play a finished song, the voice sits up front and stays there, phrase to phrase. The loudest note arrives with authority and does not crack. In the gaps between phrases you hear quiet, not hiss.
Failing: the loudest note crushes and buzzes on a word or two. Or the whole file sits low, and once you raise it to a normal listening level the voice is thin and the room is right there with you — hum, fan, air conditioning. Or the volume shifts every few phrases, and you hear the recording more than the performance.
How to Check Your Vocal Levels
You do not need new gear to check your levels. You need to know what to look at.
First, while you sing the loudest line of the song, watch the level meter. The peaks should settle in the target range and never light the red. If the meter pins at 0, even for a moment, that note is clipped.
Second, after a take, play a phrase and then hold on the gap right after it. If you can name what you hear in the silence — a hum, a fan, an air conditioner — the floor is doing its work.
Setting the level — where the gain goes and how to hold it steady across a full pass — is a step-by-step workflow, and it lives in the Reel Kit. This chapter gives you the standard and the check.
Run your file through the free Certifier — ninety seconds, no signup — and see exactly where your levels land.